If Capable Life receives a new group membership, a little work will need to be done within Moodle to allow the group leader access to manage their group members.
When the group leader purchases the Group Access Pass, they will be placed in the same automation workflow as other new users. An account should be created for them in Moodle and they should promptly receive an invitation. If they don't, there's a chance the group leader already has an account or has purchased content before. If this is the case, look them up in Moodle just to be safe. You can always send a password reset.
Moving forward for the rest of the instructions, we'll assume the group leader has a Moodle login.
TABLE OF CONTENTS
- Adding the cohort id to the group leader's profile
- Add the "Group Leader" role to the group leader's user account
- Add a new Group Membership Management widget
- Copy the Cohort URL
- Update the new Group Membership Management Widget
- Restrict access/visibility to this widget to only this person
Adding the cohort id to the group leader's profile
1) Go to the group leader's account from within the Moodle admin settings > users > browse list of users. Find the Group Leader's account, then click on it. When you are on their user profile page, click on the "Edit Profile" button.

2) Scroll down nearly all the way and expand the "Other" accordion tab. Find the "Institution" field. Add the Cohort ID as the value to the institution field. If this is a new group membership and no cohort exists for them yet, pause here and do that. Open another tab and navigate to the admin cohort page (list of all cohorts). Create a new cohort in the same naming convention as other groups, with the ID set to all caps and replacing any spaces with an en-dash "-", such as "CHURCH-NAME".
Even if you don't 100% follow the typical naming convention, the most important part for this scenario is that the cohort id and institution field are the same. Now there is a cohort, take the cohort ID and set it as the value to the Institution field on the group leader's profile.

Add the "Group Leader" role to the group leader's user account
We have created a custom system role which allows these group leaders special permissions to manage their groups. They are allowed to add users and add/remove users to their cohort. Click the following link to navigate to the page where you can add this custom “Group Leader” role to the group leader for their specific cohort.
- "Select Users to Assign Role *" should be set to the group leader's user account.
- "Select Role" should be set to "Group Leader"
- "Select Cohorts" should be set to the group's respective cohort.

Add a new Group Membership Management widget
Go to the home page and make sure edit mode is turned on. Scroll down until you find the “Group Membership Management” activities above the list of all courses (about halfway down the page).
On one of the group membership management activities, click on the vertical ellipses and then click on "duplicate". After that, find the activity which was just duplicated, click on the vertical ellipses and then click on "edit".
I recommend using the test cohort activity example so as to not accidentally interfere with a public-facing group management system.

Copy the Cohort URL
In another tab, navigate to the cohort page (where you can see a list of all cohorts), click the cogwheel icon on the desired cohort. Then click "Assign". You will land on the cohort-specific page with the two data tables where you have the ability to add or remove users to the cohort.

Copy the URL of that page.

Update the new Group Membership Management Widget
Navigate back to the Group Membership Management activity edit page.
In the text edit area, click the "Tools" dropdown and then Click on "Source Code".

Within the first button code, find the href="cohort-url-here". Paste the URL from the cohort assign page, which was just recently copied in the previous step.

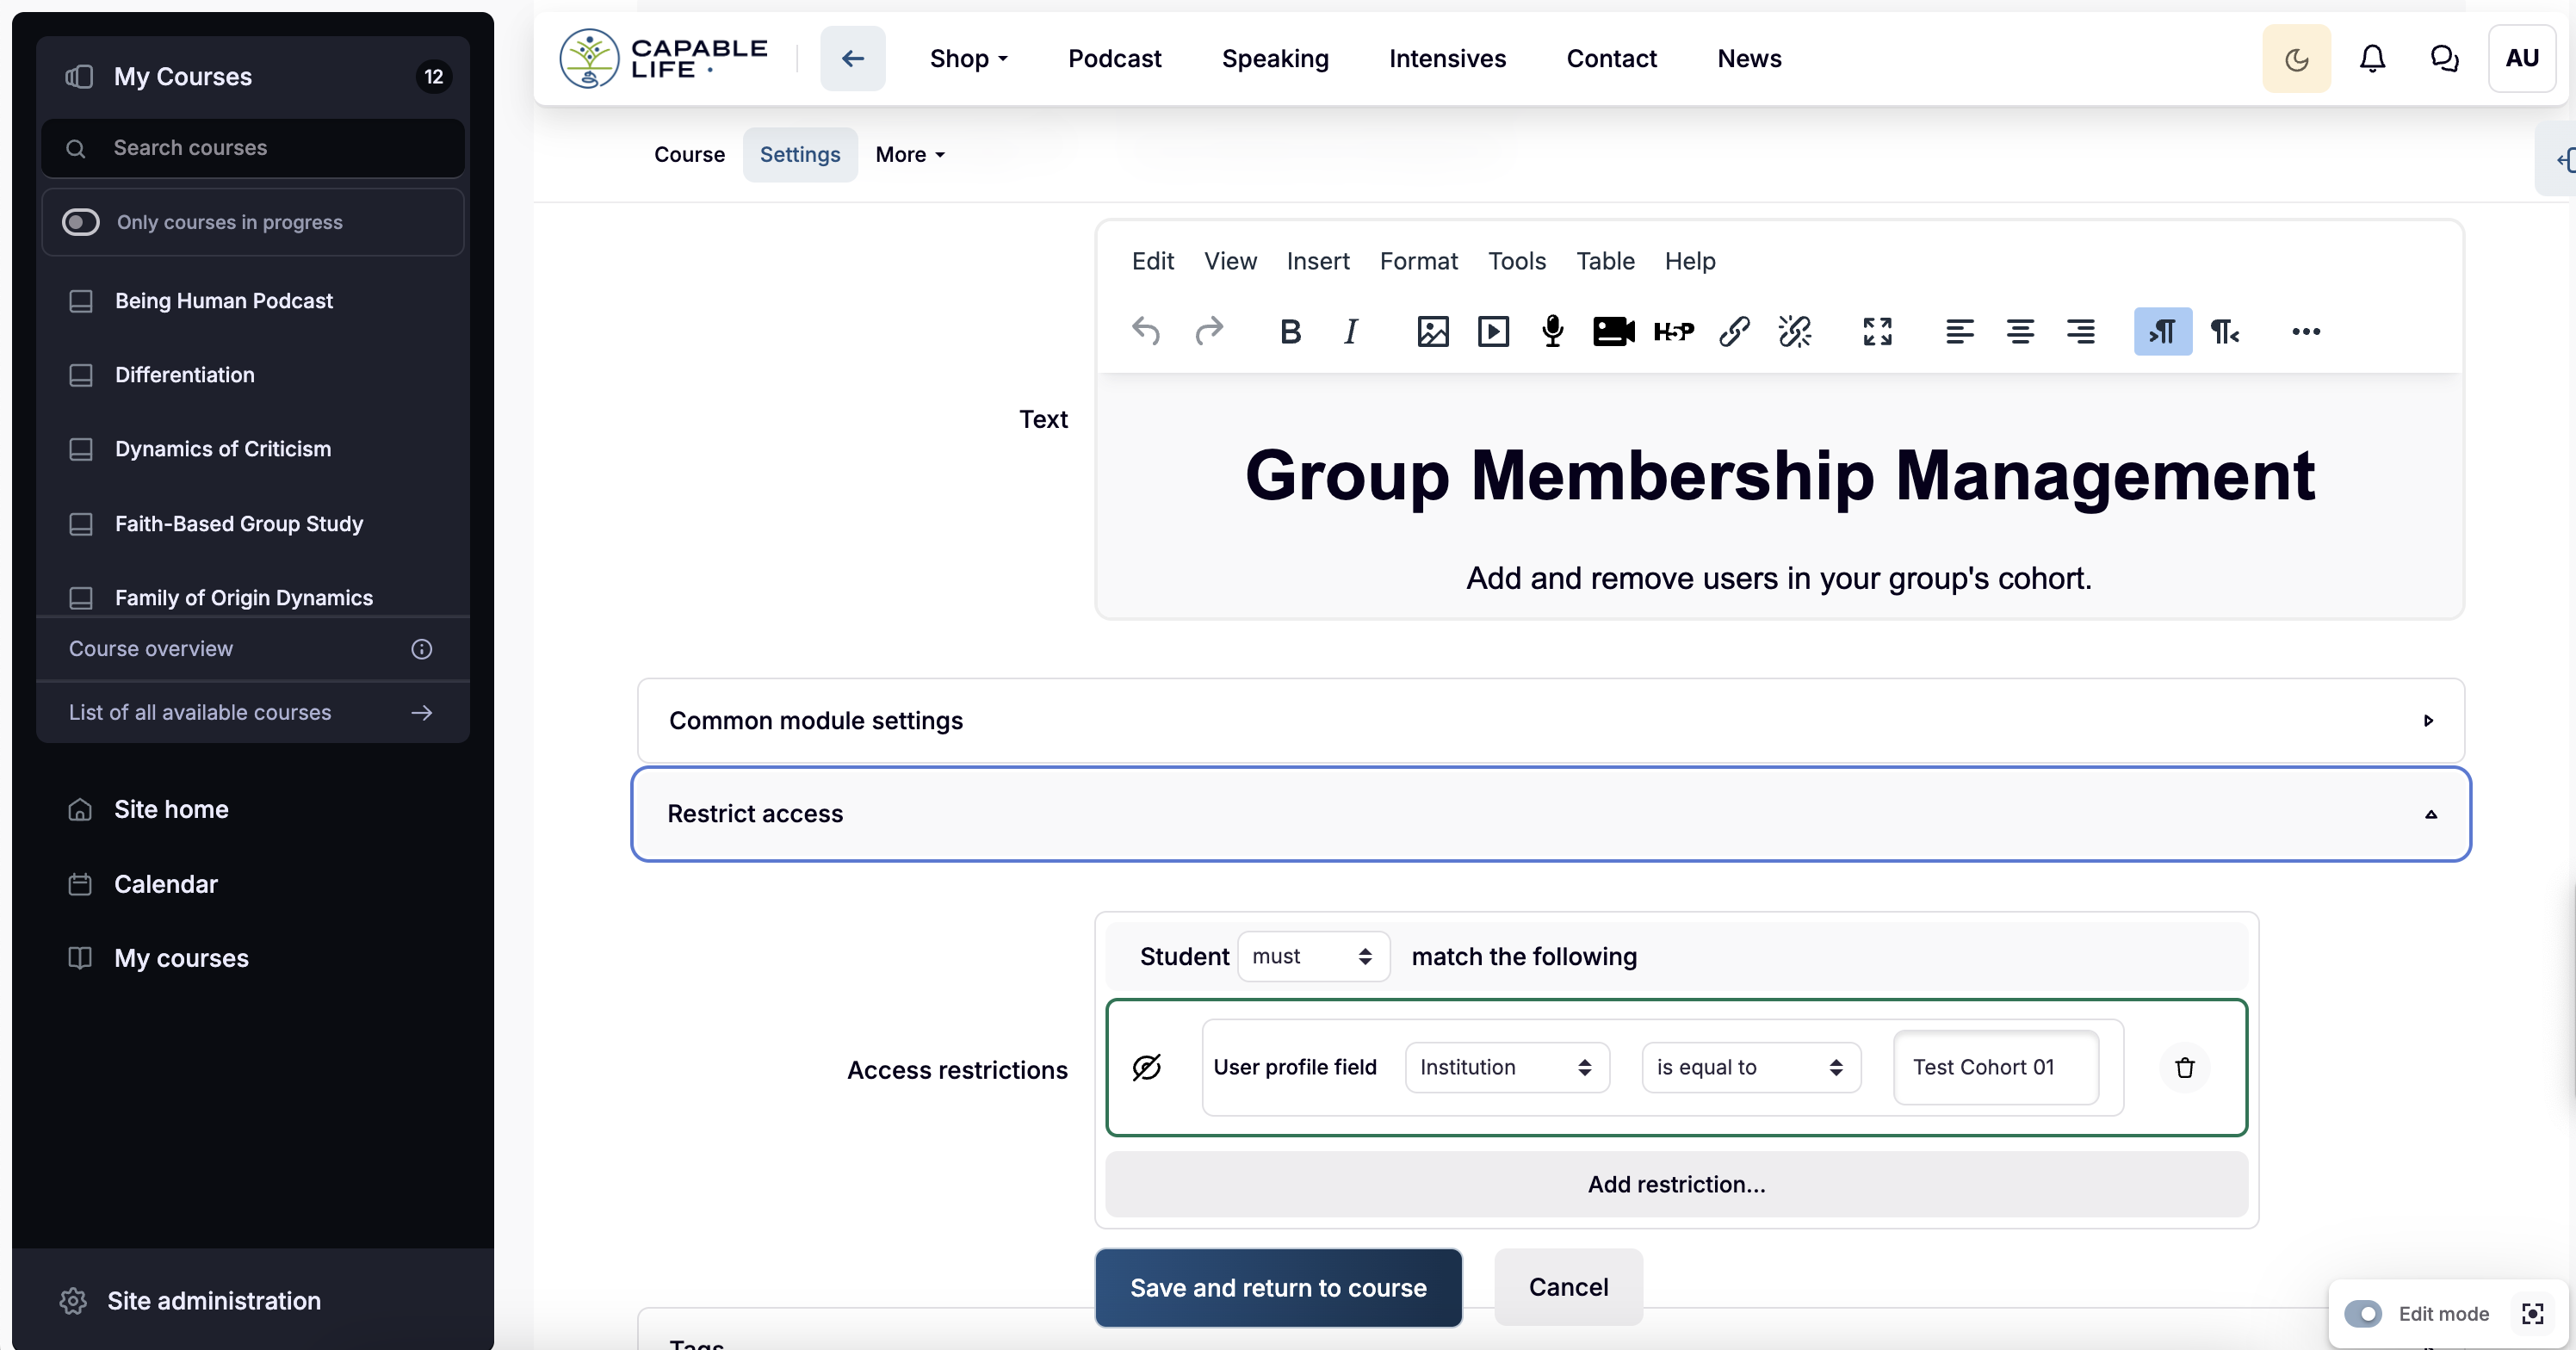
Restrict access/visibility to this widget to only this person
Now that the button within this widget has been updated and will link to this cohort, all that is needed is to restrict access to this widget. Only the group leader of this cohort should be able to see this group membership management widget — which is where the institution cohort id we added earlier comes into play.
We will now restrict access to this widget to only those who have a specific value set within the institution on a user's profile.
Find the "Restrict Access" accordion tab within the Group Membership Management activity edit page. Expand the contents of this accordion.
In our case, we will place the user's cohort id as the value for the Restrict section.
Click "Save and return to course".
The group leader should now be able to see this section on their home page, navigate to their cohort page, and create user accounts for all their members.